Many people use earplugs to protect themselves from loud and annoying sounds. They become indispensable helpers when you need to concentrate on an important task or extraneous noises interfere with sleep. You can make earplugs yourself. You just need to prepare the necessary tools, materials and follow simple instructions.

Pros and cons of homemade earplugs
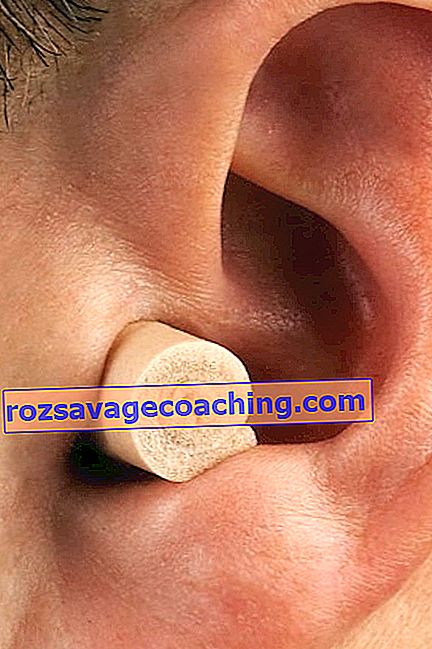
Homemade earplugs have their own advantages and disadvantages. Many people make these devices with their own hands for the reason that store products do not suit them. The standard shape is a cylinder. The name used by manufacturers comes from the phrase "take care of your ears."
All protective devices can be divided into groups, depending on the purpose.
- Sleep products.
- Snorkeling.
- Flights.
- Shallow ponds.


The advantages of hand-made earplugs are as follows.
- Homemade protective products will be perfect for you. Given their anatomical features, you can give them an ideal shape.
- Handmade earplugs will be unique, no store product can compare with them.
- If you use these tools frequently, making at home can save you money. For the manufacture of earplugs, improvised tools are used that can be found in any home.
- No special skills or tools are required to craft.
- When you need to quickly protect yourself from noise, and there is no way to purchase earplugs, homemade products will help you cope with the problem.


The disadvantages of homemade products are as follows.
- Some handmade products can only be used once. Then you have to throw them away and do it again.
- Special materials are used in the production of earplugs. They are elastic, hypoallergenic and comfortable to use. Such characteristics may not be present in the material used in the home.
- Homemade protective devices are not as durable as store products. When they are removed from the ear, small particles may remain inside, which become the cause of inflammatory processes.

DIY options
There are several ways to make earplugs with your own hands from improvised means. We'll cover the most common ones.
Cotton wool
The basis for the first type of product can be found in any home. Cotton wool earplugs are easy to use and cheap . First you need to make a dense and rigid cylinder out of the material. This shape allows you to quickly and comfortably place them inside the snake. The main thing is to choose the right length. It should fill the ear opening without touching the membrane. The excess cotton can be cut off if necessary.
The cotton wool base is wrapped with cling film. You can also use soft and elastic cellophane . In the center of the material, a small square should be drawn, inside which a cotton wool cylinder is placed. Next, the cling film is tightly rolled on one side - in the same way as triangular-shaped sweets are wrapped.
Be careful not to deform the product.


Do not forget to design a small ponytail with which it will be convenient to get the earplugs out of your ear . Now ready-made earplugs can be tried on. There is no exact rule by which to measure the size you want. In this case, you need to focus on the sensations and insert the earplugs carefully.
If the product enters the ear canal without discomfort and is held securely inside, earplugs can be used. Otherwise, you need to resize them by adding or subtracting cotton wool. Remember to release excess air when folding. If the cling film does not stick tightly to the cotton wool, you can fix it with an elastic band or thread. Soft earplugs are ideal for a comfortable sleep . It will take only a few minutes to make, and you can wear homemade devices for no more than a week.
Note: instead of ordinary cotton, you can use cotton pads by rolling a cylindrical element from them.


From plasticine
Using the process described above, you can make an item from plasticine. In this case, the earplugs must be completely wrapped in foil. It is convenient to work with such material, it is dense and elastic.


From toilet paper
Small and dense lumps need to be made from the main material. Their size should be such that the balls cover the ear canal, but do not fit inside . Next, the paper lumps need to be moistened. A few seconds under running water should be sufficient. Make sure they don't get out of shape. Squeeze the balls out gently. The balls will become smaller under the influence of moisture and after compression, so you need to add a little dry paper to each.
The moisturizing process plays a significant role. Balls made of dry material will not block noise as well as wet ones . The next step is to check the size. For this, paper earplugs must be used. If they do not cause discomfort, wear with pleasure. Otherwise, you need to add several layers or, conversely, subtract.
This option is disposable. Second use of paper earplugs is prohibited due to the high risk of infection. After removing the balloon from the ear, discard it. In the event that you urgently need earplugs, just take two pieces of toilet paper, give it the necessary shape, moisten and use. It is also not recommended to use toilet paper earplugs all the time. This is a practical and cheap option if there is no other option.
Paper products cannot be used before bed.


From headphones
Consider a more complex option for making earplugs, however, the finished product will be much more reliable compared to the options made of cotton or paper. For work, you will definitely need special swimming tabs . They are flexible and comfortable to use. It is very important that the inlays fit the size of the ear canal . Discomfort during use can cause irritation and severe pain.
We remove the sleeve from the headphones and carefully process this element using an antibacterial composition. You can buy it at any pharmacy or supermarket. You will also need silicone earplugs . Next, a neat and small hole must be made at the top of the plugs. We put on this element over the headphones, like a removed sleeve.
When made correctly, homemade earplugs will protect against loud noises. You can wear such a product only for 3 weeks. After this period, it is necessary to make new ones.
Thanks to the silicone inserts, the earplugs are comfortable to wear for a long time.


Ready sets
For quick production of reliable and practical earplugs, you can purchase a special ready-made kit. It comes with detailed instructions on how to make protective products. Thanks to such kits, you can make products of the perfect shape using safe materials. The cost depends on the quality of the raw materials used and the brand.
Note: The most basic material for making modern earplugs is silicone. It has all the essential features that demanding customers appreciate. Silicone is soft, dense, practical and waterproof. However, you can find wax products on sale.
Such anti-noise earbuds are chosen by connoisseurs of natural materials.


Summing up
Making earplugs yourself is no friend. The workflow takes only a few minutes. Knowing a few simple manufacturing methods, you can protect yourself from unpleasant noise and ensure yourself a comfortable and quiet rest. When using homemade products, do not forget that their lifespan is significantly limited, and some options can only be worn once.
Making anti-noise products will save you a lot of money. You can wear earplugs before bed, or just to keep out the noise of the city or loud neighbors. You can also take home-made earplugs with you on the plane or make a new batch before takeoff or landing.
If you are opting for diving products, it is best to spend your money on store products . In this case, manufacturers use special waterproof materials. After analyzing the above information, we can draw the following conclusion. Self-made earplugs can be substituted for purchased products.
They are ideal if you need to quickly protect yourself from noise without spending money, but in some cases it is better to use special-purpose products.

You will learn more about the difference between good and bad earplugs below in the video.