Lighting plays an important role in the home. A well-chosen light source is a combination of the correct brightness and power with a beautiful design of the lamp. A good solution would be a chandelier, floor lamp or lamp under a shade. But if neither the stylization for the past century, nor the modern product was suitable for the interior, you can make a lampshade with your own hands!

Popular materials
Custom-made interior elements integrate comfortably and beautifully into your home environment. They are made of those materials and in those colors that are combined with the design of the rooms and are key for a particular style direction.

But looks aren't everything. Any product should not only match the interior, but also fulfill its functions. Before learning how to make a lampshade with your own hands, it is important to determine what to make it from. The choice of materials is influenced by the following nuances:
- Lampshade location. Several options are widespread: ceiling lamps, floor lamps on a high leg, wall-mounted, table lamps. It is difficult to imagine the same overall structure on the bedside table as under the ceiling. In turn, a small bedside lamp will not cope with the functions of a chandelier in the living room.


- Dimensions. The larger the diameter of the plafond, the more difficult it is to make it from small elements. If only a meter of material is needed for a fabric lampshade, then for a shade made of ice cream sticks you will have to eat more than a dozen popsicles.


- Appointment. Lampshades are suitable for many occasions. They create a romantic setting for a date, a cozy, intimate atmosphere for friendly conversations, and add zest and lightness to the interior. The more light the room requires, the thinner and lighter the materials should be, the darker the lighting is planned - the denser the materials can be and the richer the colors.


- Cost. Not all materials are cheaper than purchasing a finished lampshade. So, lace, velvet, and some other noble fabrics are many times higher than the cost of a product made from scrap materials.
Lampshades made of fabrics, leather, various types of paper, fragments of wood, ropes and ribbons, beads, metal are very popular. No less common are products made from "junk" things and "alterations" that have received a new life.

Textile
Not every fabric is suitable for sewing a lampshade. It can be conventionally divided into two types: transparent and dense.
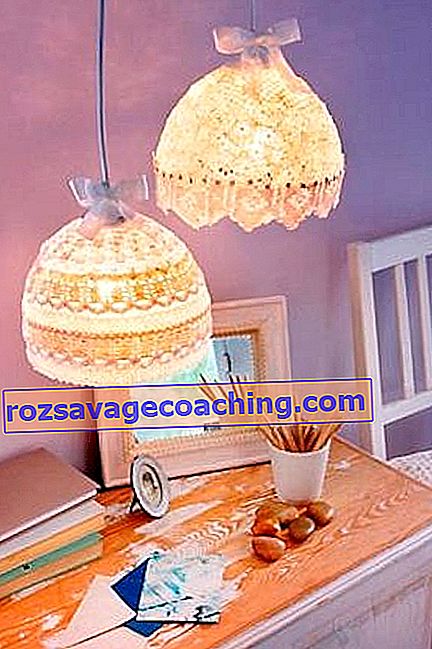
Transparent is intended for chandeliers and floor lamps that must illuminate a large area. This fabric allows you to create beautiful designer shades without compromising the technical characteristics of the lighting. Light veils, airy products made of thin lace, "knitted" openwork shades are suitable.
Transparent fabrics should be located at a great distance from incandescent lamps, and it is advisable to starch lace fabrics so that they retain a rigid shape even without a frame.


Thick fabrics are needed to create a chamber atmosphere. These include satin, jacquard, linen, matting, flock, silk, staple, printed fabrics. There is also a fabric on a lighting canvas designed exclusively for geometric lampshades.
Thick fabrics are more versatile in terms of design. They come in any desired shades and can have a pattern: geometric patterns, various types of cells, plots, birds and animals, floral and plant motifs. Separately, it is worth noting products from leather, corrugated fabric and the possibility of using adhesive tapes and ribbons to form folds of any shape.


Alteration of old things will help to save on creating an original lampshade made of fabric. Hole jeans that the hand did not rise to throw away, a sweater that moths have eaten, burlap cuts and any clothes that have served their time will be used.


Wood
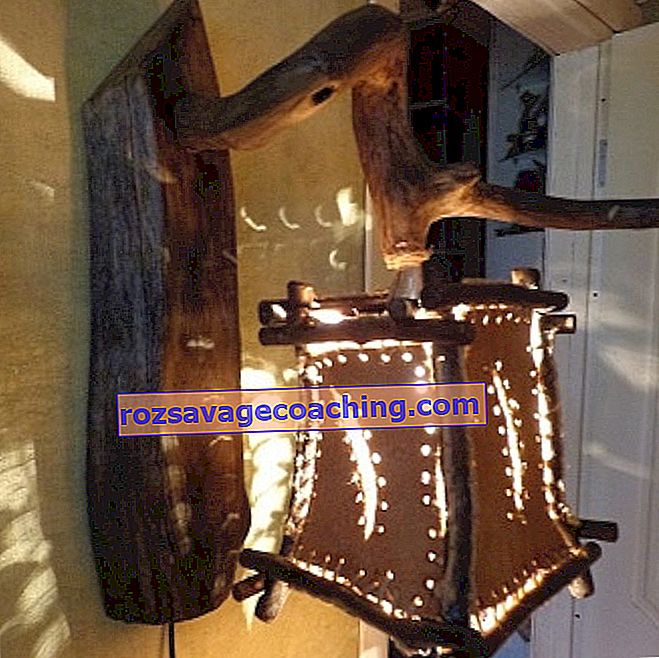
In the design of luminaires made of wood, a base is often made, and less heavy materials are needed for the plafond. However, this does not prevent the use of small, lightweight wooden parts of a non-trivial shape to create a lampshade.
These can be braids made of strips of wood (like a basket or box), flexible thin branches (willow, hazel, birch), thin wood cuts up to 10 centimeters in diameter, strung on ropes like curtains for a doorway. The lampshade looks more original, the frame of which is made from an old trash can, and the ceiling is decorated with even rows of wooden clothespins. From budget options - a decoration for a lamp from sushi sticks or a simple and elegant lampshade from a knitting hoop.


Solid wood shades are also found on the market. These are the thinnest cylinders that retain the texture of wood and transmit light, but they are difficult to manufacture and require some carpentry skills. In addition, due to the material and production technology, they are distinguished by high cost.
Metal
Many people associate with the phrase "metal lampshade" with bulky candelabra under the ceiling of Gothic interiors, but modern technologies make it possible to produce elegant and laconic products from aluminum and similar metals. They have various shapes, the depth of the dome, can be solid or consist of only "ribs", like a bare frame.

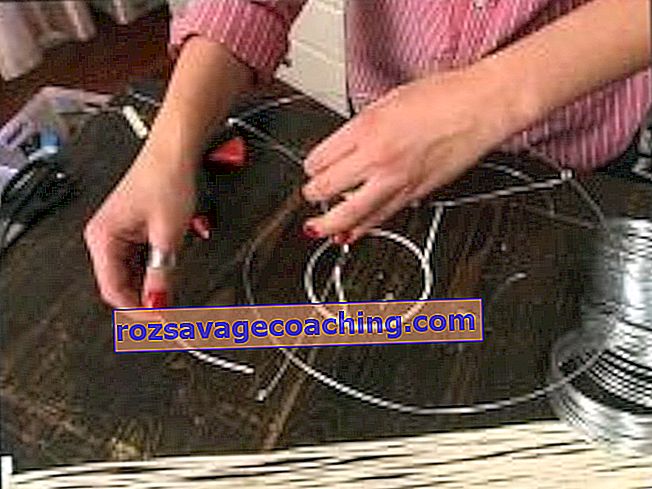
It is easy to make a budget option with your own hands from wire (aluminum or copper). Aluminum is larger in diameter, suitable for products of fancy shapes, but without decorative elements. Copper wire is thinner and more flexible. Not only intricate shades are obtained from it, but also beautiful decor of any degree of complexity. The finished wire product can be painted in whole or in separate fragments.
To give the wire the desired shape, use a small bucket, a salad bowl on a leg, a figured vase, a fruit basket, or any other item that can be wrapped on top and then removed.

Another option for home art is a coin lampshade. If old money from the Soviet era has survived at home, then these depreciated rubles can be turned into an original shade for a lamp, if you glue them together with edges using superglue. The metal circles of different sizes should form a deep bowl in which the light bulb will fit.
It is important to bear in mind that this is painstaking work, and you will need a lot of coins even for a small product, so you should not choose this option to decorate a chandelier in the living room. But as a decorative decoration for the table, it will be very useful.


Gypsum
Plaster lampshades are rare. Semicircular and curly sconces are used more often in interiors in a historical, especially antique, style.
Making it with your own hands is not difficult. All you need is a plaster mixture, water, a medical bandage and a base on which the future ceiling will be formed. The work proceeds as in the papier-mâché technique, only instead of pieces of paper, small pieces of bandage soaked in a plaster mixture are used.
After drying, the plaster product will be textured and uneven. It can be left as it is or sanded with fine sandpaper until smooth.


Plastic
Finished plastic products are striking in a variety of shapes, sizes and colors. No less original plastic lampshades can be made with your own hands, using household items from this material. Among the popular ones are products made from bottles, cups, disposable spoons and straws. The most convenient are large-volume drinking bottles.


Colored plastic is used to cut small pieces out of it. For example, you can make leaves, circles, ovals, diamonds, and then attach them to the frame. Transparent plastic serves as the basis for painting with acrylics and stained glass paints.
From bottles of 5 liters or more, a finished ceiling is obtained if you cut off the lower part of the container. The remaining top already has a hole for the cartridge, and the lower edge can be figuratively cut, set on fire (heated plastic takes on fancy shapes), or trimmed with another material. It remains only to apply the drawing.


Paper
Paper lampshades are one of the cheapest, most convenient and lightweight in execution. They are lightweight and versatile. As with textiles, they can be more transparent or denser.
Lightweight, letting in a lot of light, such shades are made of parchment or rice paper. Before cutting out the parts, the sheets must be ironed out with an iron. Dense lampshades can be made from cardboard, wallpaper, newspaper pages using the papier-mâché technique.

Threads
The most popular and simplest option is a product made of threads (twine, sisal, twine, jute), which are soaked in a large amount of PVA glue and wrapped around a balloon or inflatable ball. Due to the fact that when the glue dries, it becomes transparent, there will be no traces on the threads, even colored ones.
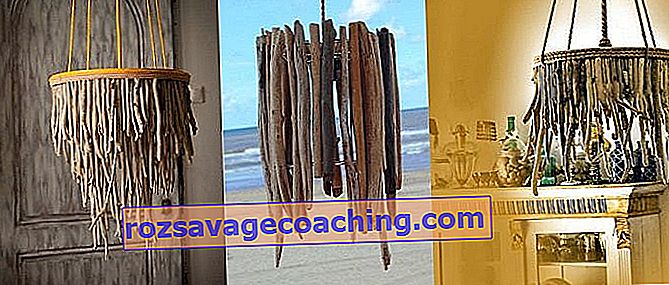
A coarse-looking and more complex lampshade is obtained from a braided clothesline or rope. It will not work to give it a round shape, but a classic semicircular, conical or cylindrical shade will turn out to be ideal for nautical-style rooms and loft interiors. Wicker plafonds made of vine, twine, using the macrame technique also look interesting.
Materials at hand
With good imagination and skillful hands, you can make a lampshade from less pliable materials: beads, beads, scraps of satin ribbons, used discs, shells, book sheets or unnecessary music notebooks, corrugated cardboard, cupcake molds and many other little things that are no longer used.


Style direction
The choice of a specific style direction for interior design requires adhering to it even in small things:
- If one of the classic trends prevails in the interior , you should give preference to high-quality materials and noble shades. Suitable fabrics, lace, bronze, golden and silver elements, graceful shapes, white, beige, burgundy, emerald, brown, as well as ivory and shades of valuable wood species. Especially advantageous will look a lampshade, which looks as if inherited from an intelligent great-grandmother.


- Ethnic design implies the presence of the national flavor of a particular country. European styles tend to be prim and elegant, the Asian region is more characterized by lightness, airiness, simplicity, the oriental style embodies fabulous motives, bright colors, precious jewelry, a combination of a large number of shades.

- The Russian style , contrary to ideas, is not a heap of national symbols, but wealth, solidity, beauty and good quality; American - freedom of expression and original content, such as the plafond from the pages of the tabloids.

- Styles close to nature favor natural and simple materials - wood, straw, coarse threads.


- Modern trends are freed from restrictions as much as possible. It is permissible to use absolutely any materials, junk items, and the most unexpected solutions in them: rope lampshades, candy wrappers, used discs with a mirror surface, paper cups and cocktail tubes. And these are just a few variations on the theme.


Master class on making
At first glance, making a lampshade yourself may seem like a daunting task, but a detailed description will help you deal with it in a few simple steps. The lightest in execution include frameless products made of paper, twine, lace.
To assemble a paper accordion lampshade for a chandelier, floor lamp or table lamp, you will need:
- Prepare a piece of paper (wallpaper is possible) 150 cm long and at least 30 cm wide;
- Using a simple pencil, mark the “ribs” of the accordion by 3 or 5 cm along the ruler;
- Assemble the accordion, focusing on the marked lines;
- Using a hole punch, make holes in the plafond along the upper edge and insert a tape or string into them to adjust the width of the upper edge of the plafond;
- Glue the two ends of the accordion with superglue.

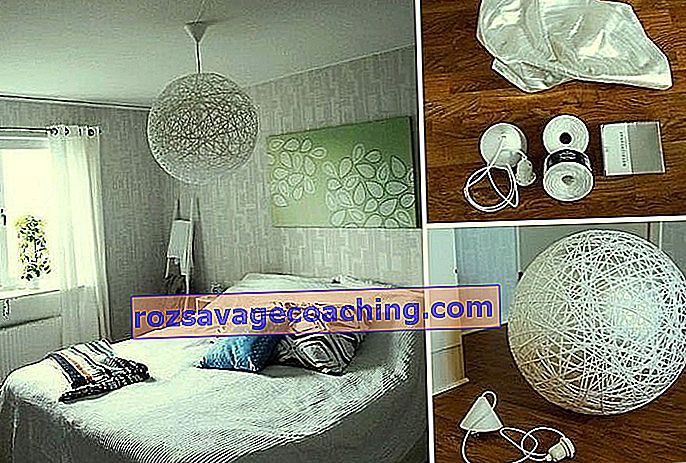
To create the most popular ball-shaped lampshade, you will need: 20-25 meters of cotton-linen thread (thick) or soft rope, scissors, construction PVA glue, water, a container for glue, a marker, a dense monochromatic balloon, medical gloves, petroleum jelly, base for the lamp.
Actions are performed in stages:
- Prepare your work surface. It is most convenient to perform actions on a table covered with film;
- Dissolve the glue with water in a ratio of 2 to 1, dip a ball of thread into the resulting solution. He should be well soaked through. If necessary, you can add more solution during operation;
- While the threads are absorbing the glue, inflate the ball to the desired size, mark a circle around the tail of the ball with a marker, the diameter of which is equal to the diameter of the bulb. Lightly walk on the ball with Vaseline;

- Tie the tail of the ball with a thread and wrap it in a chaotic manner until the thread runs out. It is desirable that the weaving turns out to be thin and spiderweb;
- When weaving is finished, the end of the thread must again be fastened around the tail of the ball and cut off the excess;
- Hang the ball in a dry place for 48 hours until completely dry. It is important to take into account that glue will drip from it, so a container should be provided below.
- Pierce or deflate the ball and remove it from the lampshade. The product is ready.


Lampshades made of round lace napkins look incredibly beautiful. They add sophistication and romanticism to the room, and at the same time are very simple to perform.
Since the basis of the lace is threads, the manufacturing technology is similar to the previous version:
- Prepare a workplace and everything you need: scissors, white glue without yellowness or transparent, lace or lace napkins, water, a contrasting balloon without a pattern;
- Dilute the glue with water, immerse decorating napkins in the mixture;

- Inflate the ball, mark the hole for the light bulb, grease the surface of the ball with Vaseline;
- Lay out the lace circles overlapping, moving clockwise from the marked hole for the light bulb;
- Leave for 24-48 hours to dry completely;
- Secure the socket and lamp.
Also, frameless lampshades include products made of metal, plastic and wooden fragments, which are glued together to form a semicircular or round shade. For example, from coins, gears, cups, branches.

The frame is necessary for more complex products made of tissue paper or fabric. It allows you to assemble lampshades of different shapes, sizes and complexity.
How to make a wireframe?
The base from the old lampshade is ideal for the implementation of conceived ideas.
If not, you can make a new one from the following materials:
- Wire.
- Metal clothes hangers.
- Plastic containers for drinks.
- Plastic and wicker baskets.
- Embroidery hoop.

The wire frame is the most labor-consuming, but the product from it is also reliable and strong. The main advantage of the wire is that it allows you to give the base any shape: cone, cylinder, square, tetrahedron.
For assembly, steel wire 2-3 mm thick, wire cutters, pliers (pliers), round-nose pliers, a hammer, a wooden block, sandpaper, enamel for painting, and a soldering iron are required.


Progress:
- Straighten the wire on a wooden chock with a hammer.
- Cut the wire into pieces in accordance with the diameter of the upper and lower rings and the height of the "ribs" of the frame.
- Clean the finished fragments from irregularities and rust with sandpaper; using round nose pliers and pliers, give them the desired shape. The classic frame is two round bases of different diameters and 4-6 ribs.
- Cut the ends of the blank for the bases at an angle, set them aside.
- At the upper end of each piece of wire for making ribs, make a small buttonhole and thread them into the upper ring of the frame. Distribute at equal distance.
- Wrap the ends of the wire on the upper ring and the junction of the base with the ribs with a thin copper wire, press with pliers and solder.
- Bend the loops at the lower ends of the ribs with round nose pliers, lay the lower base ring on them, adjust the distance, press with pliers, wrap with wire, press again with pliers and solder.
- Cover the finished frame with light-colored enamel so that after a while the wire does not start to darken and does not leave dirty spots on the fabric lampshade.

The frame from old metal clothes hangers is assembled according to the same principle as the wire hanger, but it requires less effort and turns out to be less durable.
To make it, you need to unwind the hangers into long wire strips, from which, using pliers and round-nose pliers, parts of the desired shape and size are formed. You can bite off the excess with nippers. The parts are connected to each other using construction glue, thin wire or electrical tape.
Empty plastic bottles with a volume of 5 liters or more can also serve as a good base for a lampshade, if you remove the cap and cut off the bottom. The resulting plafond can be painted, painted, decorated with plastic parts.


Large room for imagination is given by three-kopeck plastic baskets for used paper and outdated wicker baskets. They are almost ready for use as a lampshade, all that remains is to make a hole in the bottom for a light bulb, and if you turn on your imagination and decorate them, then no one will recognize yesterday's urn in a luxurious floor lamp.


The last type of frame is also based on the use of a familiar object in an unusual way. To make a simple and convenient wooden base, you just need a hoop for embroidery of different diameters. The rings are connected to each other using a rope, braid or cord with any convenient knot or through holes drilled around the perimeter. You can arrange them in ascending order for floor lamps and descending order for ceiling chandeliers.


How to sew from fabric?
To sew a classic fabric lampshade in the shape of a cylinder, you will need a pattern, textiles, upper and lower ring of the frame, PVC film for lampshades or white cotton, textiles and a spool of thread in color, a sewing machine, iron, glue, scissors, clothespins, a damp cloth, weights ...

Step-by-step instructions on how to tighten an old lampshade with a new fabric or cover a new frame with a cover includes several steps:
- Preparation of the workplace.
- Creation of a drawing of a pattern. It is enough to measure the cylindrical lampshade with a centimeter tape, and the conical one needs to be "rolled" on a sheet of paper to draw a pattern. Having marked the beginning, it is applied to the line on the paper so that it coincides with the mark, and rolled over the sheet, marking every 3-5 centimeters a new point from above and below until the “start” mark touches the paper again. A second line is drawn in this place. It is necessary to add 2-4 cm along the edges to the finished drawing, then transfer the pattern to the fabric and PVC film. Cut out the part on the film.

- Adhering film to fabric. It should exactly match the drawing, plus allowances of 3-4 cm from each edge. Now you can cut.
- Assembly. There are two options: to sew or glue the cover to the base. The second is much faster and easier, so most people prefer it. Assembly begins by attaching the lampshade to the top and bottom rings using clothespins or clips. It is important to maintain an even margin from the edge so that the fabric adheres well to the base. If the lampshade is fixed correctly, you need to mark the upper and lower edges, and the place where the seam joint was formed at at least two points.


- "Stitching". Remove the clothespins, unfold the lampshade, and put it face down on the work surface. Then connect at the designated points and glue with superglue. After that, the product must be turned over and put weights on the seam so that the glue seizes well.
- Edging. This is where the allowances left at the beginning come in handy. They are treated with glue, and then folded inward, around the base ring, and secured with clamps. This must be done alternately with the upper and lower ring.
- Bonding paper tape. This step is not necessary, but for greater accuracy, you can glue the edges with a thin strip of self-adhesive paper in the color of the lampshade.


How to update an old lamp at home?
The restoration of the old lampshade will not take much time, and the result will delight all the inhabitants of the house. There are a great many variations on the theme: an old children's lamp with cartoon characters can be draped over with a new fabric and an inscription or patterns can be sprayed through a stencil, in the bedroom you can make a starry sky with illumination, and decorate a floor lamp in the living room with butterflies.
For decoration in the kitchen, decorating with colored paste of interesting shapes (bows, shells, spirals) is suitable. The decoration looks original with lace napkins, metal elements in the style of steampunk, paper flowers.

The decoupage technique with the use of beautiful patterns on napkins and special compositions for transferring them to fabric can save the old lampshade. Antique products are created using the same technique.
If the house has gone through global changes, it is worth transforming the lamp to match the new style. Romantic light shades, floral prints, straw braids and lace ruffles will be appropriate in the Provence style, industrial themes will support a modern interior, chrome surfaces and sharp shapes will perfectly fit into minimalism, techno and hi-tech, lavishly decorated with beads, pearls, beads, ribbon, etc. lace lampshades will find their place in historical interiors, and paper, bamboo, jute and other natural materials will appeal to fans of national colors.


Stylish and beautiful ideas for homemade ceiling, floor and tabletop models
DIY design of an unusual lampshade is one of those situations when treasures from the mezzanine and old things from the balcony can find a second life. For example, colored scraps of fabric and jewelry can turn into a boho lampshade, and rough materials, metal and glass, can turn into decoration for a loft-style interior.


A beautiful ceiling lampshade in a hall or bedroom can be made of lace, paper, large beads, or decorate a cotton base with fabric flowers. The kitchen theme will be supported by lamps from old utensils, wine corks, cocktail straws, spoons, bottles. In the nursery, you can make lampshades from halves of the globe, use wallpaper with stars to frame a night lamp, decorate the room with bright small lamps in a fabulous oriental style.


An excellent solution for a floor lamp is a crocheted lampshade woven using the macrame technique or made from openwork napkins. If there are no ready-made ones in the house, knitting patterns will help create the desired pattern.

A great idea for table lamps - painting with stained glass paints on glass, imitating the corporate identity of "Tiffany".
How to make a lampshade from threads, you can see in more detail in the next video.