
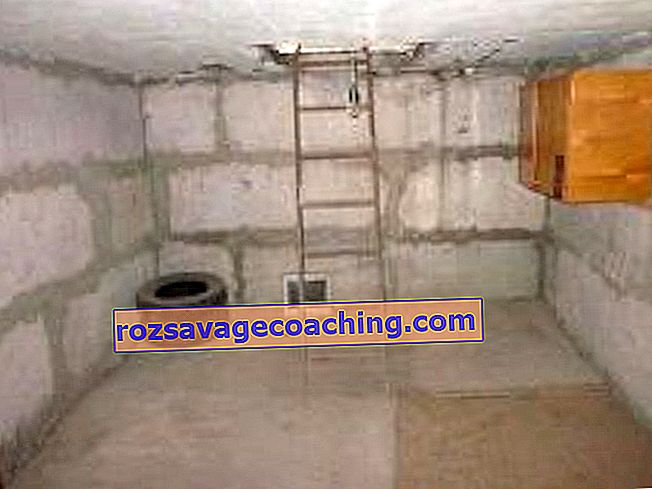
A basement in the garage is the best option for storing pickles and vegetables. Also in such a room you can equip a workshop or a rest room.


Features:
Many people want to build a basement in the garage, as this place is ideal for storing vegetables and fruits. You can also equip the basement with shelving for conservation or install a workbench, tool shelves, turning the room into a convenient workshop. But the basement is suitable not only for household purposes - it is possible to equip a recreation area in it by adding a bar or billiards to the interior.


During the construction of the basement room in the garage, you should familiarize yourself with some of the features:
- You will need to think about high-quality insulation of the basement from moisture. Groundwater should not enter the room, so you should take care of purchasing waterproofing materials.
- In some cases, the waterproofing layer will not be enough, so you need to be prepared for the equipment of the drainage system.
- There must be ventilation in the basement. It allows you to maintain the required temperature and creates an optimal indoor microclimate. If you abandon the ventilation system, during the further operation of the cellar, a fungus with mold will appear. It is not allowed to store preserved vegetables in such conditions.
- If the basement in the garage is planned to be used as a workshop or recreation room, you need to insulate the walls with a ceiling and floor. This solution eliminates dampness and prevents fungus from appearing. Only fire-resistant materials should be used as finishing.


Getting rid of mold requires not only creating the right climate, but also disinfecting the room. This will require compliance with the following steps:
- The basement must be freed from all pieces of furniture, jars of pickles.
- The walls should be cleaned with a wire brush.
- Shelves and other furniture must be dried in the fresh air and treated with special preparations. The best results are shown by a sulfur checker. The room itself can be disinfected with slaked lime.
- To prevent mold from reoccurring, you need to create a high-quality waterproofing layer in the room, and also every year to do prophylaxis against fungus.


The basement in the garage has the following positive qualities:
- The structure can become an ideal place for storing food. With its help, you can unload the free area in the garage. The basement microclimate is considered optimal for the preservation of preserves, vegetables and fruits throughout the winter season.
- With the help of special finishing materials in the basement, you can create a seating area.
- For the equipment of the basement, it will not be necessary to allocate additional space on the territory, since the room will be the zero level in the garage itself.
- A garage equipped with a cellar has a higher cost compared to buildings without a basement.
- The basement is reliably protected by the garage from bad weather conditions and temperature changes.


Disadvantages include:
- If you choose the wrong material for construction or waterproofing, the basement can become a breeding ground for mold and dampness. In the worst cases, this room can turn into a well with an accumulation of water.
- A garage basement can only be created manually. Therefore, you will need the help of friends or additional costs for the services of specialists.
- If there is a high level of groundwater on the site, a large amount of materials will be required to create a waterproofing layer, which indicates additional costs.
Projects
There are several options for equipping a basement in a garage. If we talk about the depth of the bookmark, the cellar can be semi-deep (depth - up to 1.5 meters) or deep (up to 3 meters). The last option differs in that the humidity and temperature indicators in it are always located at the same level, regardless of the season. Due to this quality, it is possible to store preservation in the room without fear.


There is a scheme according to which many garages are equipped with a viewing pit. Some users place cellars under the pit.
The construction of semi-buried cellars is considered a necessary measure. As a rule, this option is resorted to if the soil does not make it possible to create a deeper depression or the groundwater is too close at a high freezing point without the possibility of high-quality waterproofing. In practice, ground-based variations of cellars are sometimes found, but such a structure cannot be created in the garage.
Recessed cellars under the garage will be reliable if the fundamental part is located higher than 70 cm from any water source. In this case, you can even create a cellar that will be larger than the garage area. Experts advise to develop a project in advance, to make all the calculations.


It is best to build a basement at the same time as building a garage. However, most people buy space for their car rather than building it from scratch. Therefore, basements have to be built under the finished structure.
Possible problems
When building a basement, many people may encounter some problems that need to be prepared in advance.
First of all, you need to get rid of the water that is present in the cellar. Excess moisture leads to the formation of fungus. Mold is considered the main problem in the operation of cellars. It is formed due to a poor waterproofing layer, poor-quality ventilation, which cause an increased level of humidity in the room. Also, the fungus can appear due to a long stay in the cellar of spoiled products, the use of contaminated wood.


Some basement owners are faced with the fact that food in the room freezes. Therefore, special attention should be paid to insulation measures. Warming allows not only to exclude subzero temperatures, but also maintains an optimal microclimate in the room.


However, with simple insulation it is impossible to lower the moisture level. You will need to create high-quality ventilation, which will be responsible for controlling the level of water vapor in the cellar.
If the basement in the garage freezes over, you will need to buy thermal insulation materials. On sale there is a wide range of special raw materials with which you can carry out insulation. Insulation must retain its geometric shapes, have high-quality insulating properties and resistance to moisture and earth.
Most often, expanded clay, fiberglass, expanded clay concrete, mineral wool, red ceramic bricks, expanded polystyrene and cellulose insulation are used to insulate basements.


How to build?
The construction of the basement in the garage consists of several stages. Each step is an important event, without which a high-quality construction of a structure is impossible. To build a basement with your own hands, you should study the sequence of actions and step by step follow the work guide.
Preparation for construction
To build a buried cellar, you will need a major garage. To realize your idea, you need to make preliminary preparations. It consists of several stages:
- Before construction work, you need to make sure that there is a technical feasibility for the basement equipment. There are a large number of communication lines in the soil of large cities, so making a hole of the required depth is quite difficult. To reduce cash investments and decide on the possibility of carrying out work, you can seek help from a specialist or use the project documentation that was used to create the garage.
- The foundation must be protected from groundwater. This step should be envisaged even at the stage of construction of the garage with the help of a drainage system. If this issue has not been resolved in advance, thorough waterproofing of the basement will be required.


Purchase of the necessary materials
Building a basement will also require special tools and materials. For the construction of walls, you can use concrete slabs, cinder blocks, bricks or natural stones.
Concrete slabs are only suitable when building a garage from scratch. The arrangement of the cellar is carried out before the construction of walls and floors. You will also need the help of a professional installation team, which, using a lifting mechanism, can install the plate.


Experts do not recommend using silicate bricks or cinder-concrete for the construction of walls, since such materials absorb water.


To fill the base, you will need ready-made concrete M-100 or a solution made by yourself. The solution is created from gravel, crushed stone, sand and M-400 cement. The resulting mortar is suitable for preparatory work before screed and wall decoration during plastering.
To create the formwork, you need an edged board. The required amount will depend on the size of the basement. Roofing material is used as waterproofing.
When building a cellar with your own hands, you do not need professional equipment. For this, the traditional list of tools that every home craftsman has at hand is suitable.

To work, you will need the following elements:
- jackhammer;
- scrap;
- sledgehammers;
- spatula with a trowel;
- hacksaws;
- electric drills;
- screwdriver;
- pliers;
- construction shovel.


You also need to prepare measuring tools, without which no construction activity can do. You will need: a plumb line, a construction tape, a metal ruler and a level.
Step by step guide
Cellar planning should be done at the stage of building a garage. This will facilitate the work process. If the thoughts about getting a cellar appeared when buying a ready-made garage, you will need to dismantle the concrete floor. It is necessary to remove the screed from the area where the basement will be located. Work can be carried out using a jackhammer or sledgehammer.
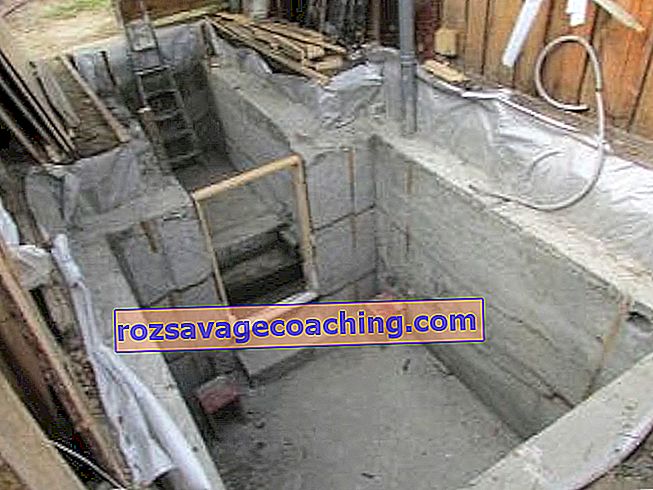
First of all, you need to prepare the pit. The depth of the pit of the buried cellar is three meters. Other sizes are allowed, which should be selected individually depending on the planned dimensions of the basement. For a room measuring 8x12 meters, a depth of 3 meters will be sufficient.


Preparation of the base is carried out as follows:
- First you need to dig a pit.
- The floor with walls must be carefully leveled and tamped. This action ensures the flatness of the surfaces in the room.
- At the bottom, you will need to fill in crushed stone and gravel in layers. Each layer also needs to be leveled and tamped.
- The prepared surface is poured with concrete mortar of small thickness (8-9 cm).
- After the concrete has hardened, you can proceed with the primary waterproofing measures. They consist in the laying of two layers of roofing felt glued together with molten resins. The edges of the sheets should protrude 10 cm beyond the basement. Then you can install the formwork and pour the mortar.


The staircase is an important detail that connects the basement to the garage.
There are two types of designs:
- Traditional access ladder made of wood or metal.
- Marching. Installation is carried out ready-made during construction work.


Several materials can be used to build a staircase:
- Wood. Since the basement is a cold and damp room, the wood must be additionally treated with antiseptic agents. This will protect the material from attack by insects and bacteria.
- Metal. If a used material is used in the work, it should be treated with abrasive materials. This action protects the future structure from the corrosion process. Then the metal should be wiped with detergents and rinsed with plain water. After installation, the steps are covered with oil paint or enamel.
- Concrete is characterized by high strength values, but protection of the material is also necessary. The steps should be painted or tiled for floor surfaces.


When creating a metal structure, the following nuances should be observed:
- Products with a width of 80-90 cm are allowed for operation.
- The clearance of the stairs in the basement should be calculated from the lower steps to the floor beams. In new cellars, this value should be more than two meters. Compliance with the dimensions minimizes the likelihood of a person hitting his head on the ceiling.
- The slope of the product should be 22-75 degrees. If a ladder is being built, an angle of 45-75 degrees is allowed.
- The width of the steps is 25-32 cm. If you make a wider tread, it will be uncomfortable to climb such a structure. Narrower steps make the descent dangerous.
- The height of the steps should be kept within 12-22 cm.


The construction of a wooden staircase consists of several steps:
- Initially, you will need to attach the bars to the supports, on which the steps will be mounted in the future. From the top point of support, you should count 26 cm and fix the bar. An angle of 60 degrees must be respected. The fixation of each bar is done with two nails or self-tapping screws.
- The other support bars are fixed in 26 cm increments.
- Then steps are attached to the bars. Nails or screws are used as fasteners.
- Installation of the structure takes place with a slope of 30 degrees. So the steps will be able to take a horizontal position.


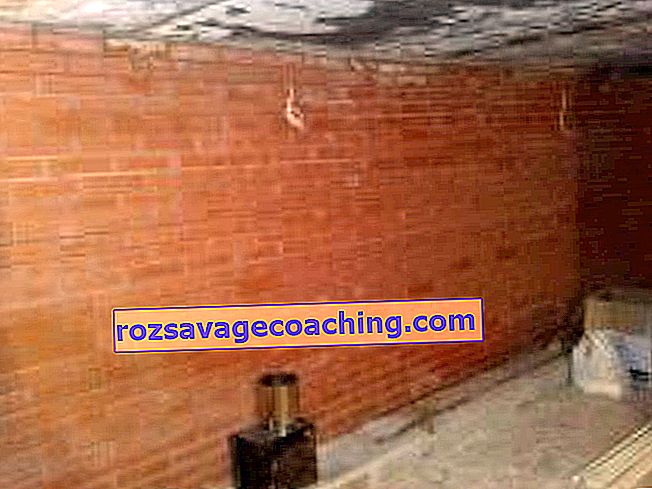
Basement walls are made of solid material only. The use of chipboard, plywood and other lightweight products is not allowed.
Most often brick is used in construction. During work, you will need to monitor the vertical arrangement of the masonry and its flat surface.


Some garage owners use monolithic concrete when building walls. For such work, the following sequence is required:
- a wooden shield is knocked down for each wall, which will be used as a formwork;
- metal pillars are driven along the perimeter of the room;
- the formwork is fixed on the racks;
- then you can start pouring the concrete solution.


Regardless of what material the walls are built with, you need to make sure that they are located strictly vertically. Each seam is trowelled with mortar. When the laying process is completed, the seams are painted with lime.
Most basements use reinforced concrete for flooring. Such a floor is created in the following sequence:
- The first step is to level the surface. For this you need to use the building level.
- Then a 15 cm layer of rubble is poured onto the base. It must be evenly distributed around the entire perimeter of the room.
- A layer of sand is poured (5 cm). It also needs to be leveled and tamped.
- Then you can start creating the floor itself. For this, a reinforced concrete slab or a strong metal mesh with a screed is used. For the second method, you will need to install reinforcing bars around the perimeter of the basement in 1 meter increments. A metal mesh is laid on the floor surface and filled with cement. The layer should be 3-5 cm.


Ventilation
A properly equipped hood helps to eliminate dampness and extraneous odors from the cellar. It also provides long-term storage of preserves and vegetables.
Two types of ventilation are used for the cellar:
- Natural. The best option for providing a room with fresh air.
- Forced. This option uses a fan.


To create natural ventilation does not require significant costs. Such a system is easy to create yourself. This will require:
- A hood is mounted under the ceiling. The pipe outlet should be located at a height of 0.5 meters from the roof. Heated air masses will come out through it.
- At a distance of 10 cm from the floor surface, a supply pipe should be installed, which will be led outside the room. It will supply fresh air to the basement.
- The outlets of both pipes should be covered with a special mesh that will provide protection from insects. Small covers are mounted on top.


During winter, natural ventilation may not function as both outlets are clogged with frost. To prevent blockage, the exits will need to be insulated and cleaned from snow in a timely manner. Some craftsmen create removable weekend pieces.
Forced ventilation differs from natural ventilation in that its design contains an improved hood. An electric fan is inserted into the cavity of the system, which creates a vortex flow and expels the spent air masses from the room. Fresh air flows into the basement through the upper pipe.


Some users use fully mechanized ventilation. To create, you will need to install a monoblock, which will be controlled by special software.
Warming
If you do not take care of high-quality insulation of the basement in the garage, it will be cold in the room. With the help of thermal insulation, you can protect the cellar from dampness. Most often, garage owners use polystyrene as insulation. The thermal insulation process involves working with walls, floors and ceilings. In addition to the foam, you can use another suitable material.


Ceiling insulation is as follows:
- All cracks and crevices must be repaired.
- Then you need to cover the surface with a vapor barrier material. For these purposes, you can use penofol, which provides high-quality thermal insulation.
- Installation of suspensions for lathing is in progress. The distance between the parts must match the width of the insulation board.
- The next layer of vapor barrier should be located at a distance of 4-5 cm from the previous level. This method is capable of providing micro-ventilation.


Floor insulation consists of several steps:
- The rough base must be leveled using a building level.
- Then a layer of waterproofing should be laid. Most often, foam is used for these purposes, the thickness of which is 5 cm.
- Penofol is mounted on top of the insulation.
- On the thermal insulation, you need to put a reinforced screed and a finishing base.
- Since the cold enters the basement through the walls, insulation will be required to ensure a high-quality microclimate.


The process of wall insulation consists of several steps:
- The first step is to lay the waterproofing layer. It will provide moisture protection. If the surface of the walls is uneven, you will need to level the base.
- Then a layer of foam is laid. Any adhesive can be used for fixing.
- The finish should be covered with a light layer of cement screed. The auxiliary reinforcement consists of reinforcement.
- A cellar is a room with a high level of humidity. To minimize dampness, an additional waterproofing layer will be required.


Roof hatch
The choice of material for the manufacture of floors depends on the dimensions of the basement. If the basement area does not exceed the dimensions of a conventional inspection pit, the upper part is created from a forty board. For large cellars, you will need a reliable overlap that can cope with the impressive weight of the car. It is best to use a concrete slab and a reinforcing frame for these purposes.


The installation of a concrete slab is allowed only during the construction of the cellar before the construction of the garage. If construction work is carried out in a finished structure, the following steps will be required:
- The supporting beams are being mounted. For these purposes, you can use railway rails, which are sold at metal collection points.
- Then concrete is poured.
- The created product will resemble a reinforced concrete slab. When the beams with reinforcement are laid, a section for the hatch should be provided.


The hatch is easy to make with your own hands from steel sheet. To work, you will need a list of tools and materials:
- electric grinder;
- welding machine;
- steel sheets 5 mm;
- metal corners;
- polyurethane foam;
- insulation material - expanded polystyrene or polystyrene foam;
- tin;
- screwdriver;
- loops;
- construction tape;
- seals.


The hatch construction consists of several stages:
- Cut out the steel sheet according to the hole dimensions.
- Metal corners are welded along the edges of the sheet. To ensure optimal sliding between the sheet and the corner shelf, a small gap should be provided.
- The inside of the hatch is covered with insulation. The foam should fit snugly against the metal corner. Foam all gaps.
- Tin is laid on top of the insulation. All corners should be bent. Tin has only a decorative component, so this step is optional.
- Then you can start fixing the loops. A handle is attached if required.
- The finished product is hung on the hinges.


Some people decorate the hatch under the floor surface. A wide range of finishing materials allows you to create a floor that is in harmony with the general style of the basement. The lid can be painted with any paint that is suitable for the decoration material.
How to decorate?
When the work on the thermal insulation of the walls is completed, you can start finishing the ceiling, walls and floor surface. Walls are most often tiled with tiles and other similar materials. You can also use coloring agents, lime or plaster.


When finishing with plaster, the process consists of several steps:
- A metal mesh should be fixed to the surface of the walls. Since there is high humidity in the basement, the plaster will not be able to stick only to the base. Dowels are required to secure the mesh. The ventilation does not need to be closed.
- The solution is applied to the wall with a trowel, and then smoothed with a slicker.
- If you plan to finish with tiles on top, the mortar should be thin.


Tips
To simplify the process of building a basement in a garage, you should read the recommendations of specialists:
- Before building a cellar, you need to study the procedure for choosing materials that are suitable for work. You should also think over the size of the future structure, familiarize yourself with the standard requirements that apply to the dimensions of basements.
- The work begins with the development of a small diagram, in which not only the location of the object, but also the dimensions should be present. Using the sketch, you can calculate the required amount of materials.
- When self-erecting a basement, you need to pay attention to choosing a place for arranging a foundation pit. The pit should be located at a sufficient distance from the supporting structures of the building.
- The basement must have high-quality waterproofing and ventilation.
- The best way to design the descent into the cellar is a ladder that will descend through the hatch.
- A staircase equipped with concrete steps is suitable for a large basement.
- The hatch cover should be made of lightweight materials so that no special force is applied when opening.


For information on how to build a garage with a basement, see the next video.